The information provided in this blog post, “DIY Guide to Installing Wood Stair Balusters,” is for general informational purposes only. While we strive to provide accurate and up-to-date content, we make no warranties or representations of any kind, express or implied, about the completeness, accuracy, reliability, suitability, or availability with respect to the information, products, services, or related graphics contained in the post for any purpose. Any reliance you place on such information is strictly at your own risk. By attempting this project, you acknowledge that you are voluntarily undertaking a DIY home improvement task and assume full responsibility for any risk of injury or property damage that may result. It is essential to follow all safety guidelines and use appropriate protective equipment, including safety goggles and gloves, when using power tools and handling materials. Additionally, we strongly recommend checking and complying with your local building codes and regulations before starting your project. Failure to do so may result in non-compliance, which could have legal implications and affect the safety and resale value of your home. Arnold Wood Turning and the authors of this blog post are not responsible for any damages or losses that may arise from following the instructions provided. If you are unsure about any aspect of this project or lack the necessary skills, we recommend consulting with or hiring a professional carpenter or contractor to ensure the job is done correctly and safely. For personalized advice or further assistance, please contact Arnold Wood Turning directly.
Installing your very own custom wood stair balusters is a rewarding project that can enhance the beauty and value of your home. While the process requires some basic carpentry skills and careful attention to detail, following the right steps can make the process both manageable and enjoyable.
This guide will walk you through everything you need to know to successfully install wood stair balusters, from initial project preparation to the final touches. If you’re looking to update your home’s interior while adding a touch of elegance, this guide is your one-stop resource to help you do so.

Tools and Materials Needed
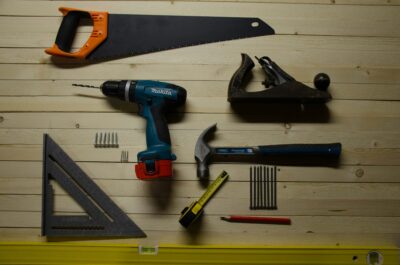
Before you begin, ensure you have all the necessary tools and materials. Here’s a comprehensive list to get you started:
- Wood stair balusters
- Measuring tape
- Pencil
- Saw (a miter saw is recommended)
- Drill
- Wood glue
- Screws or nails
- Wood filler
- Sandpaper
- Paint or stain (if you are finishing the balusters)
- Safety goggles and gloves
Installing Stair Balusters – Preparation Steps
- Measure and Plan: The first step in any successful project is thorough planning. Measure the height and length of your staircase to determine how many balusters you need. A general rule of thumb is to place balusters no more than four inches apart to ensure safety and compliance with building codes. This spacing is crucial to prevent small children or pets from getting stuck between the balusters, providing both safety and aesthetic appeal.
- Check Local Building Codes: Before you start, it’s essential to check your local building codes. Regulations vary by location. These regulations will typically dictate the maximum spacing between balusters, the height of handrails, and other safety requirements. Ensuring compliance with these codes will not only keep your home safe but also prevent any issues during inspections or resale.
- Select Your Balusters: Choosing the right baluster design is crucial. H. Arnold Wood Turning offers a variety of custom wood balusters that can be tailored to match your home’s aesthetic. Expert craftsmanship is ensured, providing high-quality, durable wood products.
- Cut to Size: Measure the required height for each baluster from the tread (step) to the handrail. Mark the balusters and use a miter saw to cut them to the appropriate length. Accuracy is key to ensure a uniform and professional look for the staircase. You can order your balusters to the exact size you want from H. Arnold Wood Turning. This step is only necessary if the balusters are not already the height that you need.
Step-by-Step Installation Guide
- Mark the Placement: Use a pencil to mark the placement of each baluster on the treads. Ensure they are evenly spaced and aligned with the handrail. For a typical residential staircase, spacing the balusters about 3 ⅞ inches apart ensures compliance with the four-inch rule while allowing for minor variations during installation.
- Drill Holes: Drill holes into the treads where the balusters will be placed. The holes should be slightly smaller than the baluster dowels to ensure a snug fit.
- Apply Wood Glue: Apply wood glue to the ends of each baluster. This will provide additional stability once the balusters are in place.
- Insert the Balusters: Insert the doweled ends of the balusters into the drilled holes on the treads. Ensure they are plumb (vertically straight) using a level.
- Secure the Balusters: Secure the balusters to the handrail and treads using screws or nails. Countersink the fasteners to allow for wood filler and a smooth finish.
 Fill and Sand: Fill any gaps or holes with wood filler. Once the filler is dry, sand the areas smooth to prepare for finishing.
Note: not every baluster has a doweled end, as many of them are just straight-cut on both ends and nailed into the top and bottom rails. Non-doweled-end balusters typically insert into railings using a bottom shoe rail and a top rail, where the baluster is secured with a fastener or adhesive. The baluster end fits into a pre-drilled hole or mortise, and is then fastened in place for stability.
Installing Stair Balusters – The Finishing Touches
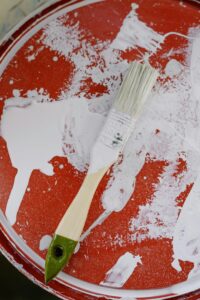
- Paint or Stain: Apply your chosen paint or stain to the balusters. Allow the paint or stain to dry completely before proceeding to the next step.
- Inspect Your Work: Once everything is dry, inspect your work to ensure all balusters are secure and the finish is smooth. Then, make any adjustments or touch-ups that may be needed.
Common Mistakes to Avoid
- Incorrect Measurements: As the saying goes, “Measure Twice, Cut Once”. Always double-check your measurements before making any cuts to your stair balusters. Incorrectly sized balusters can lead to gaps and instability.
- Uneven Spacing: Unevenly spaced stair balusters can be both unsightly and unsafe. Use a spacer or measuring tool to ensure consistent spacing.
- Rushing the Process: Take your time to ensure each step is done correctly. Rushing can lead to mistakes and a subpar finish.
Safety Tips
- Always wear safety goggles and gloves when cutting and drilling.
- Use caution when working with power tools.
- Ensure your workspace is well-ventilated when applying paint or stain.
DIY Guide to Installing Wood Stair Balusters – Conclusion
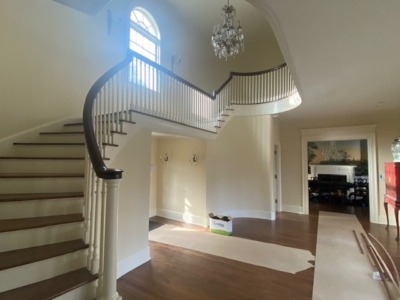
Installing wood stair balusters is a detailed process. However, with careful planning and execution, it can significantly enhance your home’s interior.
By following this guide, you’ll be well on your way to transforming your staircase into a stunning focal point in your home. Please feel free to share this guide with friends and family who might be interested in a DIY home improvement project as well!
For high-quality, custom wood balusters, consider ordering from H. Arnold Wood Turning. Our 100+ years of industry experience and range of custom options ensure you’ll find the perfect fit for your staircase project. Reach out to us today for your free, no-obligation estimate!
For more information and to browse some examples of custom wood balusters that we have created for countless happy customers, visit H. Arnold Wood Turning. Happy building!